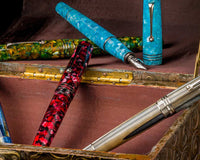
For many years, fountain pen calligraphy was a favorite pastime, but recently, just like fountain pens, it has had a resurgence. It's a task that calls for focus and concentration, and while getting it just right can occasionally be hard, it's also relaxing and produces beautiful outcomes.
A decent fountain pen will be your most reliable tool as you pick up this new skill. Here, we’ll cover some facts about calligraphy and how you can do it using a fountain pen.
The history of calligraphy
The type of calligraphy we see today (such as those on wedding invitations) has roots in both the east and west. Chinese scribes began writing on paper mostly using brushes around 200 B.C. Characters and calligraphy styles varied across writers in the present-day Chinese areas. It took until 300 A.D. for China's "modern" strategy—still in use today—to gain universal adoption.
In 1200 B.C., Western calligraphy was born in Phoenicia. This used methods for elaborate writing that were later disseminated by the Etruscans and made popular by the Romans.
 Over the centuries, the popularity of elaborate handwriting fluctuated, but it finally peaked in the late 19th century with artists doing calligraphy instruction in London.
The complicated and lengthy history of calligraphy explains why the best tool for the hobby depends on the type of script you want to write. A pen with a broad, flat nib is necessary for writing in Gothic, Italic, and Foundational calligraphy. Brush pens can be used to create works in Spencrian and Copperplate styles.
Today, we’ll be focusing on creating calligraphy with fountain pens.
Calligraphy with a fountain pen

In the West, learning how to write calligraphy entails mastering the 'thick-and-thin' effect, which draws the eye with its flowing, regular patterns.
A "calligraphy nib" is almost always a broad, flat nib as opposed to a regular, rounded point, like a biro or standard fountain-pen nib.
Because of its wide, flat shape, the nib produces a distinctive "thick-and-thin" effect as it goes across the page, which is what gives calligraphic letters their appealing appearance.
To write calligraphy, follow these steps:
1. Draft your calligraphy using pencil
A rough draft in pencil is a great place to start. You can accomplish this in one of two ways: either draft the characters precisely as you want them to look, including thicker downstrokes. You may also choose to simply sketch out the basic forms of the characters or letters in fixed-width pencil and then add the bolder strokes during the calligraphy process.
2. Choose your fountain pen nib
Fountain pen calligraphy nibs vary widely. Kits like the Kaweco Calligraphy Mini Set Fountain Pen come with replaceable nibs for different typeface weights since the width of the nib can alter the weight of the downstroke.
3. Fill your pen with ink
Fill up your pen with ink as necessary to avoid running out. Pens like the LAMY Joy include an integrated window to display the amount of ink left.
4. Practice your strokes
There are several ways to practice your strokes for good calligraphy:
Keep the pen angle constant
Keep your pen's angle constant. For the majority of scripts, you'll hold the pen such that the nib tip is angled between 30 and 60 degrees to the left and away from you. The precise angle varies depending on the script. Don’t worry about exactness so much; an approximate angle is perfectly suitable.
In drawing lines and curves, the nib shouldn't be turning. Whatever the pen and your hand do, it ought to always point in the same direction, like a compass needle. This gives the script consistency. The basis for creating calligraphic letterforms is found in this.
Lead the nib, don’t push it
Gently lead the nib across the page by moving it in the opposite direction of where it is pointing, either backward or sideways. Avoid putting too much pressure on your hand, wrist, forearm, or elbow by keeping it just above the paper.
Beginners frequently lean significantly on their arms, but this pressure makes the letters look stiff and clunky. It also hurts after a while. If you push the pen forward away from your hand, it will tend to dig into the paper and sputter or blot, and this can damage your work.
Draw parallel lines and even curves
Create parallel vertical, horizontal, or diagonal lines. All three will be necessary if you want to learn how to write different kinds of calligraphy! For instance, normal Roman letters are created on exactly vertical, straight up-and-down lines, but italic calligraphy is built with lines that slope away upward and to the right.
The Bottom Line

If you’re just starting out with calligraphy, it is worth trying a few beginner-friendly calligraphy pens for your writing. More advanced writers will still benefit from reviewing the tools and basic skills that can make good calligraphy even better.
As always, happy writing!
By Some Folks at EndlessPens


